In 2021, I established my workflow of creating and integrating 2D characters into my game – and I had the vision of adding at least 24 fully animated characters (btw, it is about 70 now now in late 2025).
However, it was then, when I realized that – at least in Unity2D – the native workflow to integrate sprite sheets and to turn them into useful, animated models, was a bit… tedious. Soon, it was clear to me that I would need a bit more convenience functionality to speed up my work. And once again, I did not want to pay for assets in the asset store.
So, I created the Animator Helper™!
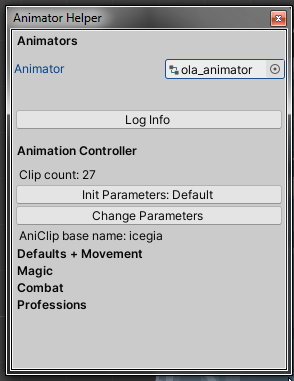
What is it good for?
- Creates (empty) animation clips with simple clicks
- Offers pre-defined, recurring clip names, like “Walk”, “Run”, “MeleeAttack”
- Establishes the link between animation clip and animator
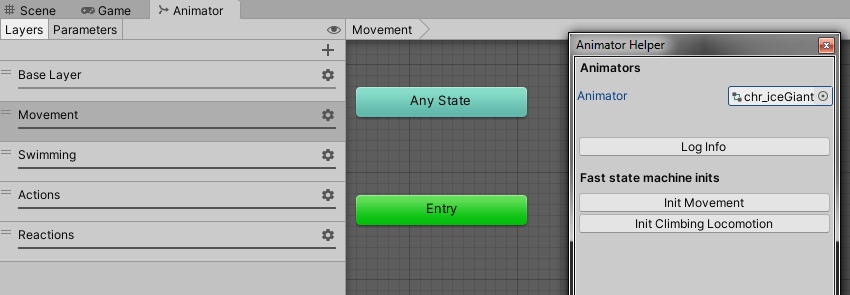
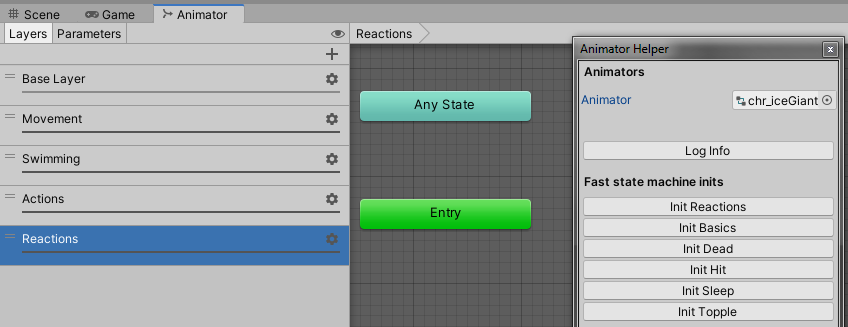
- Keeps overview by collapsable categories, e.g. “Movement”, “Magic” and so on
- Sets up animator
- Creates layers
- Adds and configures animator parameters
- Sets up animation states when layer is open
- It can also fill in the sub state machines
How is the workflow changed?
A few button clicks simplify complex task…
- Create animator controller (as usual)
- Open AnimatorHelper Window
- Assign target animator controller to AnimationHelper
- Enter model-specific prefix for animations clips to create
- Let the helper create the idle animation clip
- Click all desired animation clips from the options to create them
- Either now setup animations or do it later
- Set up Animator
- Initialize layers and parameters with one click each
- Initialize layers with wanted animation states, based on existing animation clips – one click per state, e.g. “MeleeAttackA”
Then… do any sort of fine adjustments. Eventually, finish the content of the animation clips.


When is it useful?
Case: Many models with similar setups
One is able to reliably create more character models in less time. Furthermore, the similarity of setups increases the likeliness of re-usability of code/instructions/configurations that are generating and configuring the animation assets.
Case: Complexity of animator setups
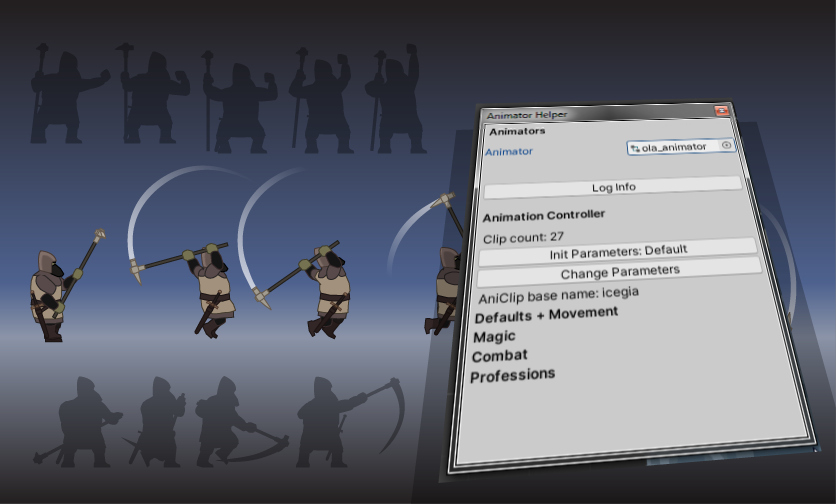
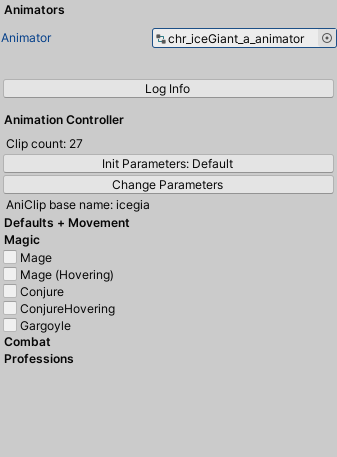
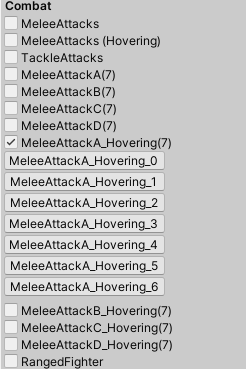
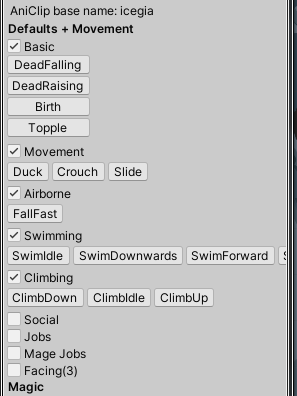
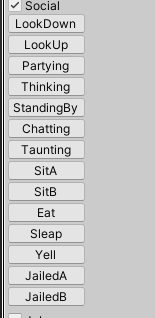
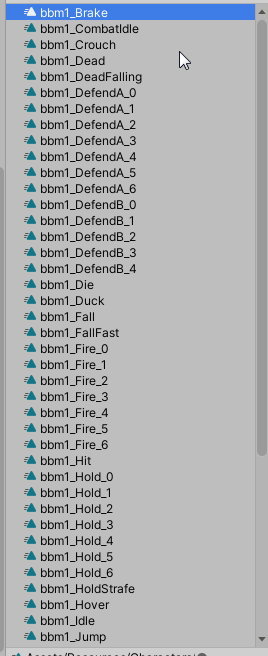
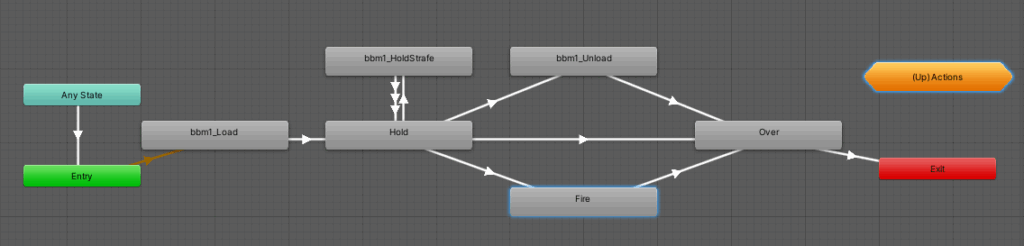
Do your characters have lots of animations? And are some of the animations multi-directional? This would result in the need of many clips, some blend states and sub state machines. Take for example these characters:
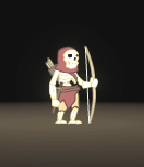
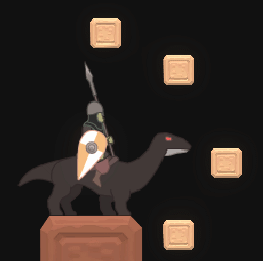
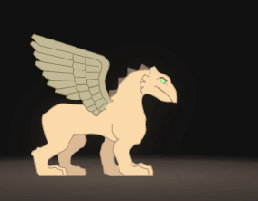
For each direction there is one animation clip. Meaning, for 7 required directions there will be 7 animation clips in total, which all have to be created, properly configured and arranged in the animation controller. And even if it was only one direction, lots of steps would still remain: The animation controller itself has to be created, the layers and parameters have to be initialized, clips have to be arranged into the layers and the states have to be linked properly with each other.
Throughout this process, naming conventions have to be respected. For example, I decided to add model-specific prefixes to the animation clips, or numeric suffixes that indicate the animation’s target direction. And of course, spelling and types of the parameters must be uniform to guarantee that the animations are properly triggered.
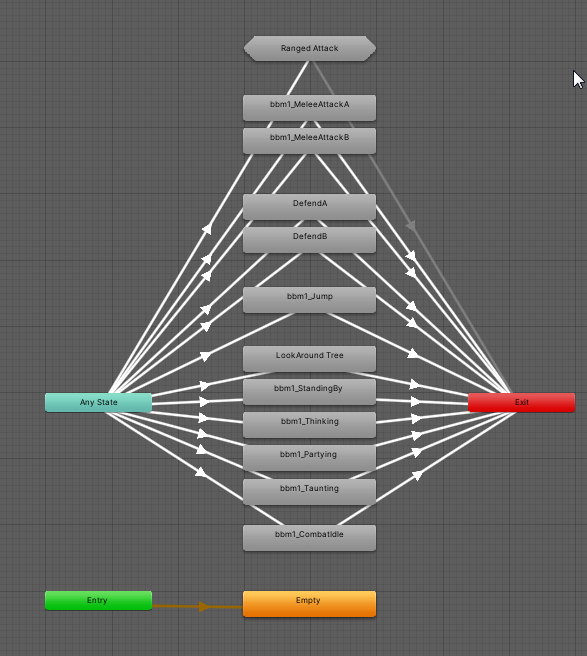
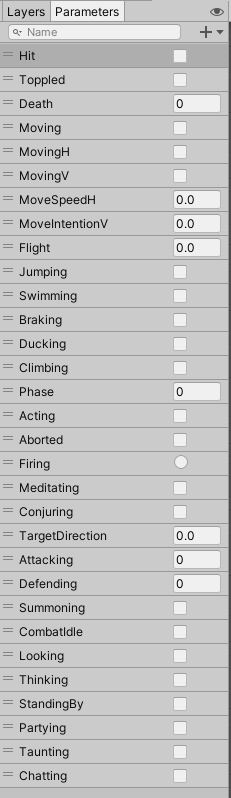
Also, sub states can get complex and tedious to set up – especially if done repeatedly. And mind the situation, that the way to set up animation states, transitions and alike, are so complex and can be forgotten throughout the development process and hence, have to be remembered and looked up. This again takes time.
The coding side
I’m not proud of the implementational side of this feature. At certain points it is highly customized for my game – that makes re-using the code in other projects less easy. And the code could use some refactoring, too. But development time is usually not spend primarily on tools development, but rather on the actual game itself. I also was a bit sloppy with method names back then.
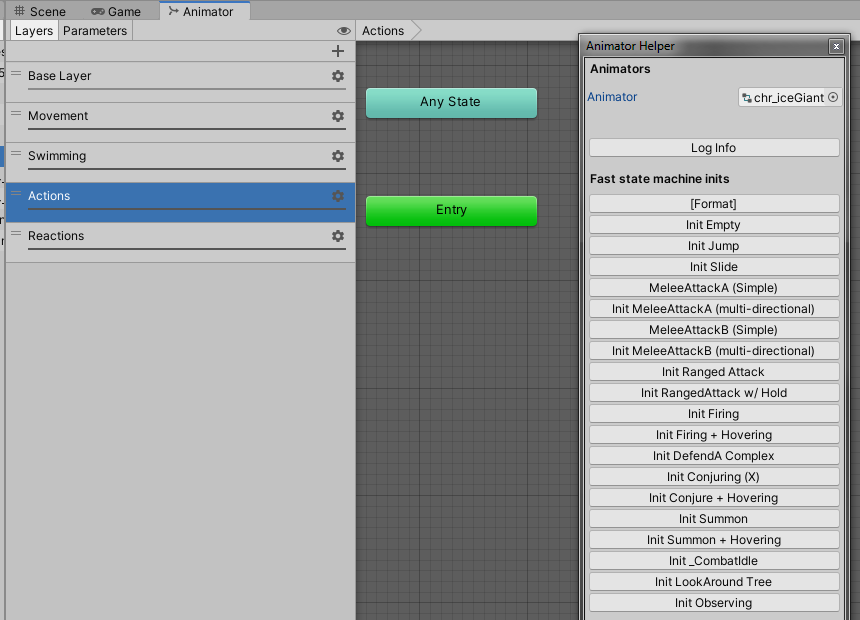
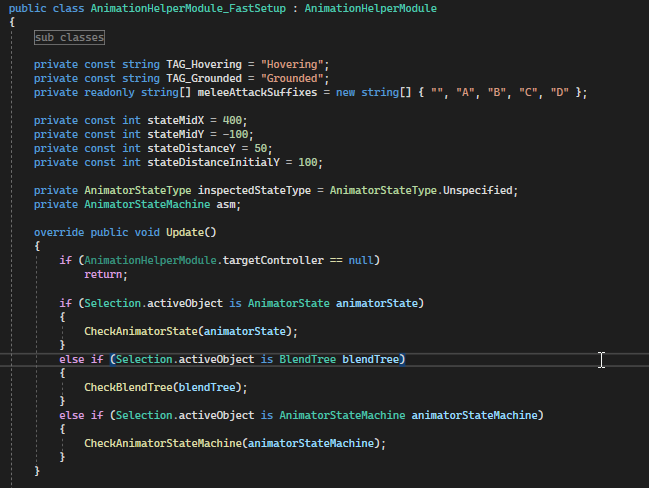
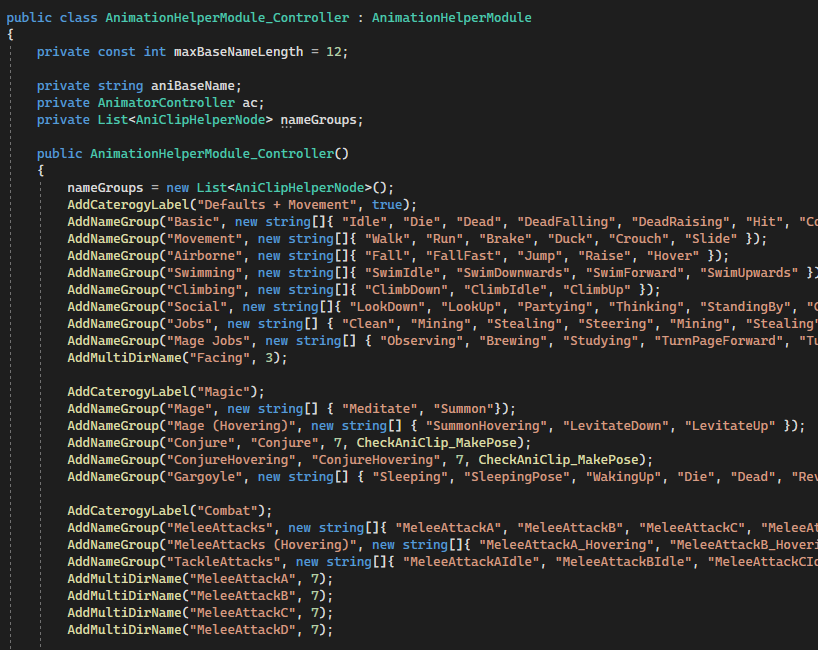
Code example 1: Content modules
At least, the growing complexity of the tool forced me already at one point to come up with a modular approach to visualize the content of the animator window. Following this line of thought, the modules could be easily replaced by something different, more project-specific. And existing modules could be abstracted, wheras the project-specific logic could either be transferred to sub classes or customized with help of configuration-ScriptableObjects. (just thinking)

The modules shown in the picture above own an Update() method that draws the content only if it fits the current situation. E.g. Animator Controller layer setup options are only visible if the a layer is selected. The type of Selection.activeObject is therefore checked as below…
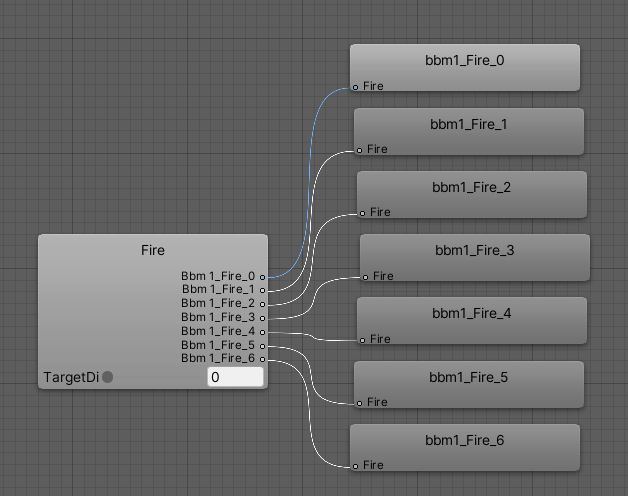
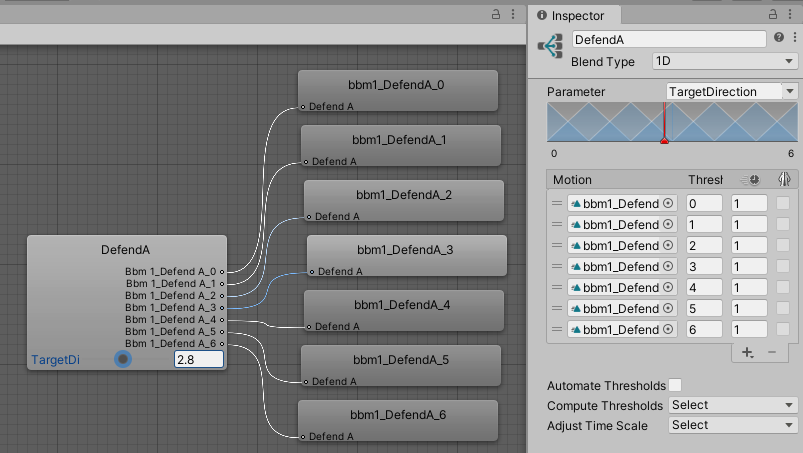
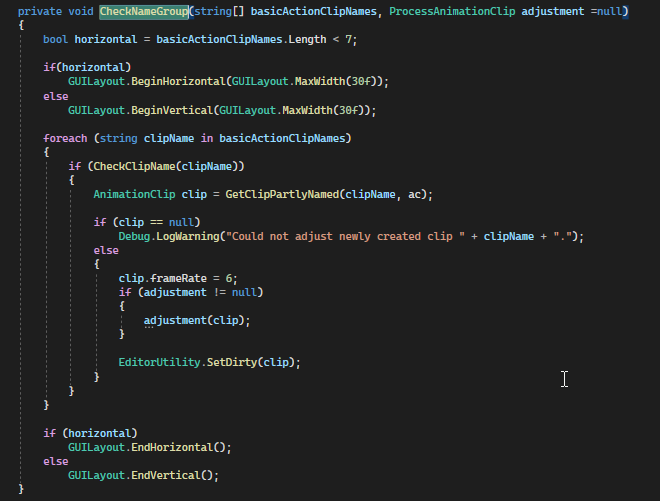
Code example 2: Generating AnimationClips
In the following screenshots, you can get an idea of how the animation clip options are registered, presented and handled. It is all done in code.
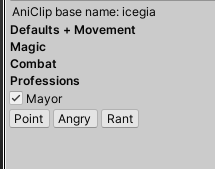
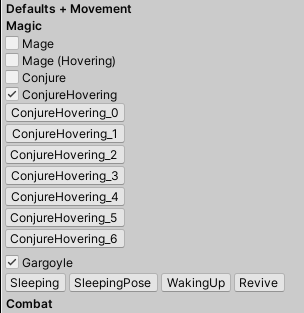
The options, that are grouped by categories, are traversed and presented only, if the related animation clip is not found. The method CheckClipName(clipName) draws the button for the clip only then, if the animation clip does not exist yet. An optional delegate ProcessAnimationClip can be specified to post-process the so created animation clip. I used that for poses, as you could see with the “Conjure” name groups above, where I passed the method CheckAniClip_MakePose, which internally slightly changes the AnimationClipSettings.
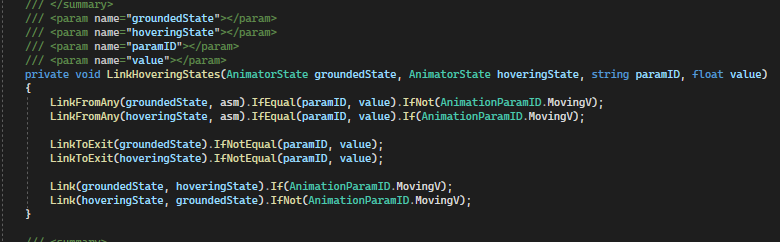
Code example 3: Generating state transitions
The logic I am linguistically proud of, is the generation of transitions within the process of generating animation state machines. By using the fluent interface pattern, the code looks still short and simple. The main idea here is that methods like LinkFromAny(...) and LinkToExit(...) are returning a new Object of type TransitionWrapper, which itself provides beautiful methods like IfEqual(...) and IfNot(...) to specify and add the conditions that otherwise had to be manually adjusted.
The benefit of automation
As this article might have demonstrated, manually creating and managing so many animation clips, states, parameters and alike is simply not economic (time-wise) – and it is an error-prone process. Having a tool that assisted me during these steps where possible was cruicial for me. Yet, it took also some time to create the AnimationHelper. But all in all, it was totally worth the effort.
If it was not for this tool, I would’ve just created 5-7 models and maybe I would’ve gone insane with all the micro management. But, thanks to the tool, I created over 70 already.
Image sources: Yves Scherdin, Screenshots from UnityEditor and VisualStudio (2025)